Showing posts with label bargains. Show all posts

Wednesday, July 10, 2013

Summer {favorites}.


  Back in March I did a favorites post. It was so fun, why not just make it a seasonal thing? K. I'm so in love with summer {and spring and fall} and really, seriously plan to live in a beach town someday. We haven't been able to log much sun/pool time yet this year, but I'm banking on our upcoming lakehouse vay-k to make up for that! Also, it seems important to note that, while it didn't make my list, I am currently obsessed with our new patio furniture. This is evidenced by the three hours I sat outside working around it today. Helloooo, tan lines! 

1// Old Navy Vintage tees. These shirts are the bomb.com. Old Navy basically has a summer long sale on everything in their store, these included! I have about 7 of them in different colors and I wouldn't mind have a few more. LOVE them. 

2// Hillsong United Zion. This cd has been on repeat for weeks, and I finally bought a legal copy on iTunes yesterday! {pats self on back}

3// the Festival necklace. Ok, I'm sure you're sick of me talking about Noonday. {I just really can't help it} But I love this necklace that I bought after my trunk show in June. It goes with everything {like my favorite tees!} and is so darn colorful!

4// Zinnias. I've already said it a zillion times {here and on instagram}, but I can't get enough of my zinnias! I have two or three bud vases full of them every day and they just make me smile, you know?

5// Volcano candle. Have we talked about this and how much I love love LOVE it? Or how I basically crapped my pants when I saw that it comes in a smaller {read: cheaper} size?? If I could only burn one candle for the rest of my life, it would be this one.

6// Parks and Recreation. I'm not sure what happened, but Justin decided he likes it now. We tried watching it a year or so ago, and he hated it. Either way, we're loving our post-cable life with Netflix episodes of Leslie and the gang!

7// Sally Hansen's Xtremewear polish. While its not a bright and summer-y shade, I could wear Grey Area every day and never get sick of it.

8// Green tea. Iced green tea is my summertime jam {when I'm not sipping boozy lemonade, of course} and this is my go-to brand.

9// Book club. We've had some duds over the past couple months, but I'm excited about this month's read. And really, I just kind of love book club. No matter what we read, we really just have a good time eating and drinking together! Start one. 

10// Straws. I usually snag a big box of straws in the dollar aisle, but this year my mom grabbed me some big, chunky, colorful ones from Ikea. Love! 

And, just because I really do love them, another zinnia photo. 


  But enough about me. What are you obsessed with this summer?? 

Thursday, March 21, 2013

Chalkboard tumblers.

  Its no secret that I'm obsessed with chalkboard paint. And, in my defense, my obsession started way before it was super trendy. Chalkboard paint is my go-to gift idea. I love repurposing old sauce jars with a fun cookie/cake mix inside and cute chalkboard note on the front. Or just one big puppy treat jar (thanks for that idea, mom!). 

  Its also no secret that I love a good glass of wine. I've recently broken out our stemless wine glasses- you know, the ones that have been tucked in the back of our cabinet since our wedding. I've never really known what to do with them. But they are so much less fuss than a stemmed glass. Easier to hold, clean, and less chance of breaking. Since, you know, wine is involved. 

  Anyways, I had been eying my bottle of chalkboard paint and was itching to use it. Honestly, I saw a stemless glass sitting on the kitchen counter and decided to dig the rest out and just do it! {Dear book club- act surprised when I break these out next month? They'll be your favor for the evening!}
Here's what you'll need: tape, chalkboard paint, foam brush, wine glass. 

  The process was so simple, I didn't bother with pictures. 

-I simply taped of a rectangle on each glass to use as a guide- and painted within it. I didn't want the chalkboard surface to be perfectly square, I like the 'messy' look. So I didn't paint up to the edges of the tape- just stayed within it on each glass. I recommend using a foam brush, as it gives a really even coat. I ended up doing about 3 coats on each glass- letting them dry thoroughly between each. Then I conditioned by rubbing some chalk on each and voila! 


Cheers! 

{Linking with Shabby Nest, Tatertots and Jello, AtoZ, 36th Ave, Someday Crafts, Young & Crafty, Under the Table & Dreaming, Today's Creative Blog, DIY Showoff, Shabby Creek Cottage, Serenity Now, Not Just a Housewife, Whisperberry}          


Wednesday, March 13, 2013

Favorites.


   I've found myself stuck on several things lately. I do that- find something, realize I love it, and use it over and over and over for a stretch of time. I once ate salmon cakes every day for a month straight in high school. I bought a sweatshirt at Target for $6 two months ago and have worn it at least two times a week since. Obsessed. Here's what I can't get enough of right now {besides that sweatshirt, of course, since I'm wearing it right now...}

1// Hart of Dixie. I fully blame Lauren for this addiction- I'm about to finish the first season and am already stressing about how I can catch up on the second season! Do tell if you know where I can find all the episodes...you'd be my new bff. I'll bake you a cake. 

2// My fav pen. I'm pretty sure it came a from the vet's office and I know it's totally quirky, but I have a thing with pens. I find one {usually a cheap, promotional one like my current} and use it literally until the ink is out or I lose it. 

3// Handmade soaps. I picked some up at the Urban Homesteading Market while I was in Denver a few weeks ago. They smell amazing, even Justin loves them!

4// Washi tape. My mom surprised me with 8 new rolls in my mailbox over the weekend and I find myself wanting to washi everything!

5// Eric Hutchinson stationFor a few years now, this has been my go-to sunny day, good mood station. I know every song played by heart, I've heard it so many times.

6// Pink Magnolia candle. It's heavenly. With a light, fresh scent that I can't get enough of- I have two of them burning right now!

7// A delicious, homemade Caesar salad. I made the Caesar dressing and croutons and Can. Not. Get. Enough. Look for the recipe {& book review} soon!

8// The Inner Circle by Brad Meltzer. We read it for our first Book Club, and it was a great read. I couldn't put it down, am sad its over, and want to know what the next step is for the characters. If you're looking for a good read, pick this one up!

9// My Camelbak. I used to be a Nalgene girl- since, you know, I drink a gallon of water every day- but have fallen in love with this gem. I take it everywhere.

10// Sally Hansen's XtremeWear polish. I love this polish, especially since its cheap and the only one that stays on my nails. My go to colors right now are Golden-I and Strobe Light.

11// Light Blue by DG. This stuff smells so good. Light, but wonderful. 

What are you loving right now? Any must have's I need to add to my list? Do tell!

Wednesday, January 16, 2013

Kay-suh-dill-uh.


Justin and I have gotten back into eating healthy over the last few months {funny how easy it is to get out of that habit!} and one of the things we've been doing is buying some frozen entrees. Say what you will, but those things are so convenient. Especially when you don't want to cook for one, are pressed for time, and on completely different schedules than your spouse. But it irks me every time I nuke one of those meals...because I know for a fraction of the price and little time in the kitchen, I can make something just as delicious. One of my fav frozen entrees were these yummy breakfast quesadillas. But I knew I could easily make my own, and have breakfast for a week- for the same price as two pre-made quesadillas. So I did!

And they were a success!!! So I thought I'd share my recipe...they're so good, easy to make, and pretty darn healthy to eat.

Cook 3 strips of bacon {I prefer turkey bacon!}, let cool. In the same pan {you know, because everyone loves that bacon flavor!}, make a large batch of eggs. I only like egg whites and ended up using about 5 for this recipe. In a bowl, mix cooked eggs, shredded bacon bits, 1/4 cup cheddar cheese, and some diced green and red pepper. Lay out tortilla {I used 5 for this recipe} and spoon mixture evenly into each. Cook each quesadilla, one at a time, in the same skillet. Let cool for 10 minutes and wrap individually in foil. Freeze for up to two weeks. 
To prepare, microwave individual quesadilla for 2 minutes, flipping every 30-45 seconds. 

Enjoy! :) 

Tuesday, October 16, 2012

Glitter.

I was more than ready for fall to come this year and even started decorating before the end of August {its true}.
My favorite fall decoration this year has been my glitter pumpkins...they're super cute and were cheap & easy.
And I love cheap & easy.

All you need are a few dollar store pumpkins {and one really cute one from JoAnn's that was on clearance!}, some painter's/masking tape, spray paint, mod podge, glitter, and hairspray.

I spray painted my pumpkins white so they'd have white peeking out instead of orange, making sure to wrap the stem with tape to keep its color. Then I brushed them with mod podge and rolled in my glitter. This left a lot of bare spots, so I took a spoon and shook glitter onto those spots, brushing with more mod podge as needed. Then I let them dry for about 30 minutes before coating with hairspray to keep the glitter on.

Like I said, easy&cheap!
What's your favorite fall decoration this year?!


Wednesday, September 19, 2012

No Spend September: Dollar store crafts.


Well, let's just call a spade a spade.
We officially suck at No Spend September this year.
Its basically over. Eating out has happened, new shoes have been purchased.
But we're still trying to spend less overall.
So a win-win? Sure.

But just for good measure, I thought'd I'd share a super cheap and super easy fall project with you, in  case you're looking to save some moolah but still be trendy & crafty
Ha. 

I love wreaths and have even gotten into the whole jute-wrapped letter thing. But honestly, the cutest wreaths aren't really cheap at all to make.
And I just couldn't stomach spending even $20 for a fall wreath.

Enter the dollar store. 
I was there a couple months ago, stocking up on planners for my clients. I noticed some plain {and puny} wreaths and had a lightbulb moment. So I bought the stuff, knowing it'd be a fun treat to put together during No Spend September. 

While its definitely not the most gorgeous, statement piece ever...I kind of love it!

And really, for $3?! 
Yes, please.


I didn't even bother to take step-by-step pictures, because it was just so easy. I took the little bunches of berries & leaves off the floral stems and hot glued them to the wreath in a cluster. Then I unscrewed the hook from the R {I bought it for $1 at Michael's a few years ago and never got around to using it as a hook} and painted it with some acrylic paint I had on hand.
Then, after lots of finagling, I glued the R on to the wreath. It was a bit tricky figured out where to glue it at so it didn't look silly. I ended up using some fishing line to secure it, since the R made the wreath so bottom heavy.

So less than $5 and 10 minutes later, I have a fun fall wreath that I don't feel the least bit guilty about. 
Gosh, I love the dollar store. 


Friday, August 31, 2012

September.

Without even realizing it, September is already shaping up to be a really full and fun month! Between weddings and college football games, our weekends are already booked up...and I'm so excited.

Even my little blog has got a full schedule for September!

First, don't forget about the photo challenge coming up in September. Whether you want to do every week, just one, or simply want to check out other people's pictures...the first link-up with be Thursday, September 6th!
Here are the categories, in case you forgot!


Second thing, September has unofficially become a No Spend month in our house. We did it last year, after a summer of spending and starting a Fall that required saving $$ for buying our house. This year, we've got a vacation coming up and a lot of little things we want to take care of before my student loan repayments start in November. So we decided to do it again! Last year, we simply tried not to spend. This year, I want to be a bit more planned about it all {sorry, J! I know you hate my planning...}. So look for weekly posts about No Spend September! I'm trying to round up a few guest posters, if you're interested or have good tips...let me know!

Lastly, September is my second month for Sponsors! All ads are free...and I still have space for next month. Check out my Sponsors page for details. And if you have an Etsy or other handmade shop and want to get featured for free...you might be interested in the Large ad spots :) Email me if you have any questions!!! 

And maybe in a few weeks, I'll have some more exciting news to share! {No, I'm not pregnant.} September really is shaping up to be great, and its not even here yet :)

Happy weekend!!!!

Wednesday, May 30, 2012

Chalk it up. {diy}


I think Murph approves of my new kitchen chalkboard :)
This was one of the easiest & cheapist projects,
but it required So. Much. Patience.

Here's what I used:


I already everything I needed on hand. My mom gave me the chalkboard paint awhile back {about $10/can}, the frame was leftover from my RA days {$9.99 at Big Lots}, and I always have trash bags, a foam brush, and 3M strips on hand.

I had the hubs hold the frame leveled on the wall and I used a pencil to trace inside to give myself parameters to paint around.
I use a foam brush to paint, but you'll get smoother results if you use a roller. 
After I let the first coat dry for several hours, I applied a second. 
As soon as the 2nd coat was dry to the touch, I put up the frame.
{because I have no patience!!!}
But then the sucky part.
I had to wait 4 DAYS to write on it. 
So just about first thing this morning, I broke out my chalk and wrote on this baby!
I love it.


When I was snapping pictures to post, I realized I've never really posted pictures of our house. Let's chock it up to our lack of decorating thus far. But its becoming more and more like a home each day!
So, here's a mini house tour from our kitchen :)


 And since I'm sharing crafts today, I HAD to share a Pinterest craft I tried this weekend and LOVED.

Coffee filter peonies! Each flower took me about 3 minutes. And you can dye them any color or leave them white. So easy.
I'm even going to make purple ones for my baby niece! 

Ok. Go make them.

Or just have a wonderful Wednesday!


Photobucket

Tuesday, May 15, 2012

Grass.


Our poor sweet house. 
Since we moved in last November, we've done literally no decorating outside of the two rooms we painted when we first moved in. 
The worst has been the mantle in our living room...its been so bare and empty and just stares at me, begging me to do something.

So I dug up $6 and did something.
I made some knock off grass planters to flank the sides of the mantle.
Simple & easy.


I bought one stem of grass, floral foam, and {not pictured} floral moss each for $1 at the dollar store and a set of 3 square wooden planters on clearance at Michael's for $3. I already had white spray paint, but you can usually pick this up for $1 at good ole Wal-mart!


I started off by spraying the planters white...


...and stuffing one square of the foam in each planter {It came in a 4-pack}. Can we be real? I actually got really eager when I brought my supplies home from the store and stuffed the foam in first thing to see if it fit :) So...you might notice some spray paint on the foam here!


I kind of just took a stab at how much grass I'd need when I only bought one stem. It was actually perfect. The grass was in bunches on the stem that pulled right off and were perfect for sticking into the foam.


After all the grass was off the stem, I counted the pieces and put an even amount in each planter. Be sure to evenly distribute the grass in each planter so it looks even and not too spaced out.


Mmmmm. I just love wine.


After the grass was all in, I stepped back and realized it looked really sparse. 


So I took the grass from the third planter and divided it among the other two. Two full-looking planters are better than three-empty ones, right? 


I heart my baby glue gun. 


Break out that moss and just glue it onto the foam around the grass. Fill it up nicely so no foam is visible!


Still a bare mantle, but its looking better already! I think I may buy another stem or two of grass and add more to them. I'm also thinking of cutting the grass to be short. Hmmm...thoughts?


Craft & Tell


Tuesday, April 10, 2012

{diy} Infinity.

A few weeks ago, two of my heart friends came over for a night of crafting. We each chose a project {found on Pinterest!} and went to work.
I had found this infinity scarf tutorial that looked SO easy.
And we each followed it to make a scarf...
but it was pretty much a flop.
They were WAY too short and a bit wonky.
It had been bothering me ever since,
because I'm super cheap and didn't want that fabric & project to go to waste!

So yesterday, I ripped the seams out and started all over.
And came up with a pretty sweet, easy, and cheap infinity scarf!


Here's what you need:

Fabric:: I had the store cut 15 inches of standard width cotton
Coordinating Thread:: ha. I just used what was in my machine, cause I'm too lazy to switch it out. :)
Scissors/Rotary cutter


Step one:: Fold fabric in half and cut in half along the 15 in width. {Does that make sense? You want to end up with two long, somewhat skinny pieces. So if your fabric was 15in. to start with, you would cut two pieces that are 7.5in. x whatever width they started out. Kapeesh?!}


Step two:: Unfold fabric and sew the two long pieces together {short end to short end} by placing the two pieces on top of each other; wrong side up. Be sure to backstitch.


Step three:: Now you should have one realllly long piece of fabric. You with me? K. Fold  in half lengthwise; right sides together. Pin & sew. {Or if you're lazy like me, just sew w/out pinning!} 


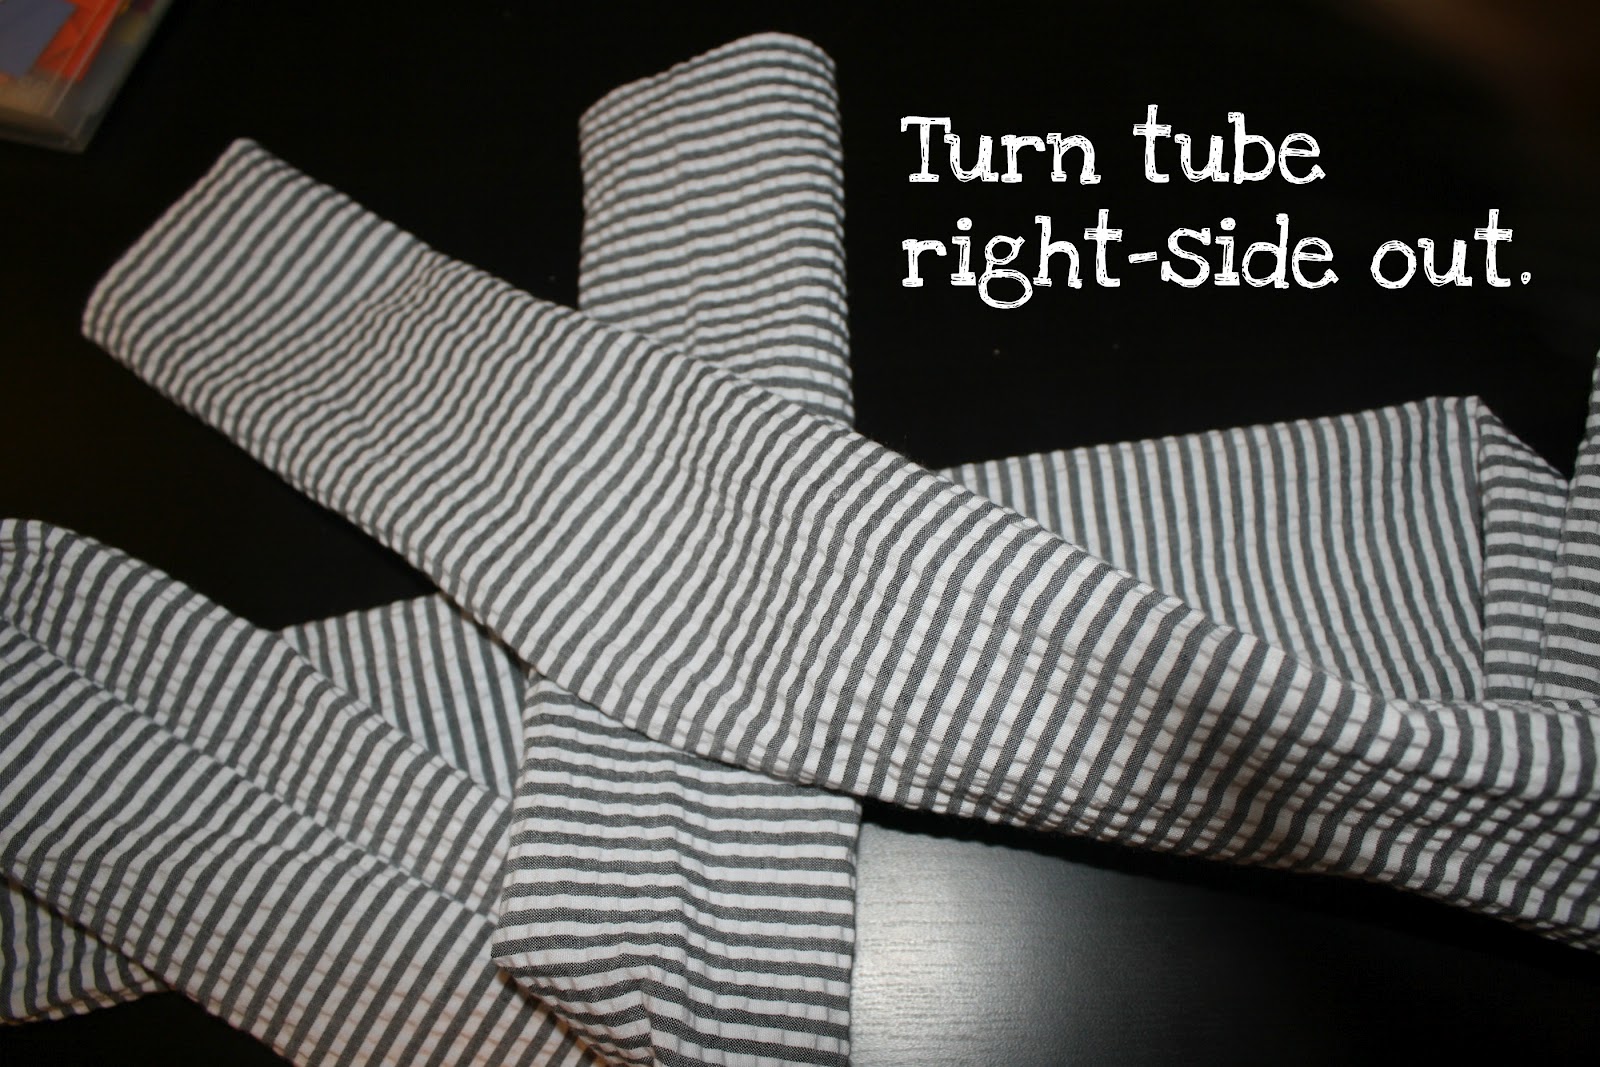
Step four:: At this point you have a really long tube. Turn the tube right-side out and turn the raw edges down.


Step five:: Tuck one raw end into the other and sew shut; being sure to back stich.

Step 6:: Voila! Go rock you easy peasy infinity scarf!