Showing posts with label diy. Show all posts

Tuesday, April 25, 2017

$20 sandbox.


 I posted a picture of my kiddos playing in our little sandbox last week and immediately had a dozen messages with questions about it. I am absolutely not the first person to think of this, but it's too good of a life hack to not share!

  While we lived in the limbo of moving/not moving/moving last summer, I felt ANTSY. The backyard at our old house wasn't awesome for a toddler and I didn't feel great about letting Caleb play in it. I also didn't want to spend money on a solution or find ways for it work for us because I knew/hoped we'd be moving soon. Enter the budget sandbox!

  I actually stumbled on the idea of a DIY water table and set out to make one. While shopping for a plastic container to serve as the table, I decided to buy two so that I could fill one with water and other with sand- then swap them out whenever we wanted. I built a frame to hold the boxes- but it was super jank and it didn't make the move with us.

Look at those chunky legs and that baby face!!
  This truly is one of the boys' favorite outdoor toys, only tied with the playset the previous homeowners left behind. I usually keep it in the garage most often and pull it out to the driveway in the evenings while we kill time waiting for Justin to get home from work. Tyler is old enough this year to play and he loves it too! I moved it to the backyard last week and its been fun to see how long it truly does hold their attention.

  Funny enough, my parents actually gifted Caleb this real full-scale sandbox for his birthday last year, but we never got around to putting it together with the late summer move. I finally did this weekend and the boys LOVE it. (if you're in the market for a nice sandbox, I recommend this one! Affordable as bigger grandparent gift, crazy easy to put together and just the right size) We've already logged a few hours in it and filled two diapers with sand (tyler). Even with the new, big sandbox- we'll keep our little one around! Like I said, its perfect for storing in the garage and pulling out when we're waiting for Justin, doing yardwork, etc.

  Anyways, you don't care about any of that. Want to make your own budget sandbox? If you have $20 and time to run to Walmart, this 'project' is for you. (you can't see, but I'm using air quotes and laughing as I type that because this is the least project-y project you could ever do. Ready?

  First, buy a storage container. Next, buy some play sand. Finally, pour the sand into said container. You're done! 😂 But seriously, if you want the exact details of ours (its big enough for two kiddos to easily play but still small enough to store and move around easily):

-I used this exact container. It's $9.59 at Target but I'm almost positive I bought it for cheaper at Wal-mart. The size is great and having a lid is key! We actually left it outside most of winter and the sand stayed dry and the container is still in perfect shape.

- I believe I bought 3-4 bags of play sand from Wal-mart. They're $2.78/bag which is incredibly affordable. A note about sand: Justin found SUPER cheap ($1.99/bag) sand at Menards and we used that to fill our bigger, permanent outdoor sandbox. Even still, I would recommend the slightly more expensive play sand I linked above because it's nicer. A bit more clean, no big rocks, and better for a box you want to keep and use indoors/driveways/on patios. The cheaper sand is just that, cheaper. Its perfect for a sandbox that will be rained on and survive the winter, but probably not for a nicer box that will have a lid and doesn't literally sit on the ground with grass and bugs.

- The boys have somehow accumulated a ton of sand toys over time (mostly as little gifts from grandparents!) but I also randomly found a fun sand/water funnel/wheel at Nordstrom Rack last summer. Super random, I know. (here's the exact one) The dollar store, Target's dollar spot, and amazon are other great places for inexpensive sand toys. Last year Caleb loved simply hiding rocks, pinecones, and sticks in the sandbox and then digging for them, so don't overthink the toys! (I like this little set from Amazon a lot)


Tuesday, December 22, 2015

Kitchen dreams.


 So I realize its Christmas week and most blog posts are about Christmas-y things. But I like to be different? Really, I've just been thinking a ton about updating our kitchen lately. We'll be putting our house on the market this Spring/Summer-ish and all the talk about it has me making a mental list of things we need to update or change to get ready for that. Including some updates to our kitchen!
  To be honest, I'm pretty bummed we haven't updated our kitchen during the past four years. When we bought our house, it was the only project I really, really wanted to do. There has just always been somewhere else to put our time and money and its been hard to get Justin on board. But I'm determined now! Maybe its the perfect winter project?
  I love our house. Its been the perfect starter house for us. But it is pretty builder grade and the neighborhood is very starter, so when I say I want to update our kitchen, I'm not talking about custom cabinets and granite countertops. Just a coat of paint on the cabinets and walls and maybe some new light fixtures. I've been dying to paint our cabinets white since the moment we first walked through this house! It would be silly to do any expensive remodeling, since we'd never get that money back when we sell it. But the little updates of fresh paint would just brighten up the space and make it look so nice!
  So, help me out. What tutorials or tips do you have for me? Honestly, we've though about hiring painters to tackle our cabinets. The guys that touched up our outside trim gave us a super cheap quote. But is it worth it to just do it myself? 

Monday, December 21, 2015

Last minute treats. {peanut butter fudge}


  I love sweets, especially around Christmas-time. Especially around Christmas-time when I'm nursing and feel like I could eat 5000 calories a day. So when I was jonesing for a treat last week, I defaulted to my favorite layered fudge. I shared the super simple recipe for my mom's chocolate fudge here, but never shared the even simpler peanut butter fudge recipe. You probably have everything you need on hand right now and it is so peanut butter-y delicious. I hate the recipes that use peanut butter chips, they just don't taste right. But this one. Oh my goodness, its amazing.
  And because I just can't leave well enough alone, I think its even better when layered with chocolate fudge. I forever want to kiss the person who first paired chocolate and peanut butter together. One of my heroes. I pour the pb fudge into a parchment lined dish and top with the chocolate fudge; refrigerate to set and voila! The tastiest and easiest fudge you ever made. Perfect for last minute treats to share with friends, take to family dinners, or {if you're like me} keep completely to yourself...

Peanut Butter fudge
2 stick butter
1 cup peanut butter
1 teaspoon vanilla
1lb powdered sugar

  In large bowl, microwave butter and peanut butter for 2 minutes; stir and microwave for 2 more minutes. Stir in vanilla and powdered sugar; pour into 8x8 dish lined with buttered parchment paper. Chill in refrigerator for up to 2 hours to set {or top immediately with chocolate fudge before chilling!}. Cut and enjoy!

Wednesday, October 21, 2015

Granola bars. {recipe}

  
{image source- because I absolutely never make my bars look that awesome}


  So I've totally shared this recipe before. It's one of my favorites though and I made another batch last week to take to a family I love so much. Food, gifts, hugs, letters, quality time- those are my love languages. And I'm a creature of habit. I make the same recipes over and over to share with friends and put together a pretty cheesy gift basket for about any big life change my friends celebrate. It only seemed fitting that I bring this recipe out of the archives to share today. Especially since I sort of forgot about that batch in the oven I made last week and they got a little crispy. I'm whipping up another batch today to redeem those and I already can't wait to have these on hand for snacks the rest of the week!
  These granola bars are so so good and simple to make. You probably already have everything you need for them in your pantry! I always change them up a bit based on what I have on hand {sometimes I'm out of coconut or add almond slivers instead of walnuts}. So basically, you can't go wrong with these. Unless you don't let them cool before you cut them. That's key!


Peanut Butter Chocolate Chip Granola Bars

What you'll need:
1 egg
1/2 cup peanut butter
1/3 cup honey
2 tbsp oil
1 1/2 tsp vanilla
3 1/2 cups oats 
1/2 cup brown sugar
3/4 tsp salt
1/4 cup chopped walnuts {optional}
1/4 cup sweetened coconut {optional}
1/2 cup chocolate chips

Preheat oven to 350. In large bowl, mix together egg, peanut butter, honey, oil and vanilla. Set aside. In medium bowl, combine all dry ingredients except chocolate chips. Add dry ingredients to wet, mixing evenly. Add chocolate chips. Press mix into greased baking dish {I use a 9x13} and bake for 12-15 minutes or until edges are slightly browned. Cool completely before cutting into bars!

Wednesday, July 22, 2015

Summer on the table.


  One of the best parts of summer is being able to easily find fresh foods. Berries, greens, watermelons- all things that are harder {and more expensive!} to find during the winter months in Indiana. When I realized it was my chance to host cooking club this month, I knew I wouldn't actually cook anything and that we would definitely NOT be having chicken {my biggest pregnancy aversion}. So I opted for this light summer salad and really simple watermelon slush. You guys, not to be dramatic or anything, but if you could put summer on a table, this is it. 


  They're both extremely basic and you could probably recreate them with what's already in your fridge. The salad is such a hodge podge- you could mix it up with candied nuts or feta cheese. We added some sautéed shrimp {all the seafood for me right now, thankyouverymuch}, but you could add grilled chicken or go completely meatless, too. 

  
{Summer salad: Spring greens, strawberries, blueberries, raspberries, avocado, toasted almond slivers, goat cheese crumbles, raspberry vinaigrette}

And this slush. You literally just need a watermelon, lime, and sugar. Yes, yes, yes. There's a 100% I made myself an entire pitcher again today because I love it so much. I may or may not decide to share with Caleb and Justin...

{Watermelon slush: 5 cups cubed watermelon, juice from half lime, 2 tbsp sugar, 2 cups ice- blended}

  So I'll officially be eating/drinking these on repeat until Fall. What summer recipes are you loving right now? 


Thursday, July 16, 2015

A quilt.


At least twice a week, I get asked about Caleb's baby blanket. So here you go!

{see more shots of the quilt in all of Caleb's monthly updates!}
  I love cooking for people, giving gifts, and- I've learned- sewing. Let's start by making it really clear that I am so not good at sewing. My mom gave me my machine the first Christmas I was married and signed me up for a 1 hour Joann's class learning how to sew a pillowcase. Other than that, I just wing it and learn as a I. And rip a lotttttt of seems out. But I love it. I love sewing special things for people I love, especially my kiddos!
  After following a really simple pattern for my first two quilts {both for babies}, I knew I wanted to try something a little different for Caleb. And then I saw this photo floating around on Pinterest. I had to recreate it! While still an extremely simple pattern {probably easier than the other's I've made!}, I just love how it looks. I spent a few months collecting fabric, after choosing my color combo. I think from start to finish, this quilt took me maybe 2 afternoons? It was really so simple. About a week before Caleb was born, I started trying to sew his name on {we kept it a secret until his birth and I didn't want anyone stumbling on his blanket before he came!} and it looked HIDEOUS. Evidently I really don't know how to appliqué. And then he came early! So my sweet mom took the quilt and appliquéd his name for me. {thanks mom!} But other than that, easiest quilt ever. And so cute. Someone asked me the other day if I'm worried about the large white center getting stained. I'm not! Caleb used to spit up all the freaking time, and in all colors of the rainbow once he started eating real foods. But if he stains it, I just blot some bleach on. Of course I don't want the quilt to be ruined, but I don't want to pack it away never to be used. So instead, we use it all the time! A little wear and tear just adds character, right?
  So, after a full year of being really loved {going on plane/car/stroller trips, keeping Caleb warm at night, catching lots of spit up and goldfish crumbs, and being washed regularly) it has held up perfectly! Still bright white!
  I loved the pattern enough that I recreated it in fun colors for my new niece and will probably be recycling it again for other baby gifts {spoiler alert to all my expecting friends!}. But I'm on the hunt for a new fun pattern for baby number two, and can't wait to start once we find out the gender {8 days!!!!}

Friday, December 5, 2014

Joyeux Noel. {DIY}


  Who doesn't love a good holiday craft? I'm finding my time is really precious these days and I'm opting to buy lots of things instead of making them lately. But that doesn't mean I'm not crafting at all anymore! I'm simply prioritizing. I've got some baby things in the works, a really big housewarming gift {even though you moved in 6 months ago, Lauren!}, and some baby holiday crafts on my current DIY list. And I really wanted to make one nice Christmas decoration this year. 
  I've been eying all those gorgeous rustic-ish wooden signs for a few years now, but never wanted to pay such a large price tag for one. And then I discovered Royal Design Studio's new Christmas collaboration with Jennifer Rizzo and I had my solution! You know I already love Royal Design Studio's stencils {have you seen Caleb's nursery here and here?}, and I absolutely love Jennifer's style. Have you seen her new book? It's full of ideas for decorating your home for Christmas- with real house tours. I'm swooning over all the gorgeous decor! Her stencil line is also gorgeous, and I had a hard time choosing which ones I wanted to try out. My favorites were the classic letters, garland border, and Santa reindeer stencils. They're each so versatile and I have at least half a dozen ideas on how to use them still floating in my head. 


  But for this project, I stuck with the classic letters and garland border.  It was SO easy. The stencils are really durable {same great quality as the one we used on the nursery wall} and simple to use. Besides the stencils, the only thing I had to buy for this project was some red chalk paint- I had everything else on hand! I found the board in our garage, already cut to the size I was looking for, and had all the other paint and brushes from past projects. 
  I started by spraying my board white {after cleaning it off a bit}. I fully planned on leaving it white. I started lightly tracing the letters to gauge spacing and to start lining them up to paint. But then I didn't love that spacing I chose, so I just painted over then entire board with some neutral chalk paint leftover from my bathroom makeover {I love chalk paint right now}. After some good sanding, I kind of fell in love with the accidental color- distressed and pretty! Then I simply lined up my garland stencils, taped it into place, and painted away! Chalk paint is perfect for stencil project because it dries so fast- so the wait time between each garland piece and letter wasn't very long. The rest of the project is pretty self explanatory, right? I painted the other side of the garland and then each letter, one by one. While I chose a more subdued red color and purposefully didn't keep my painting too clean, it was still a little too bright and simple for me. So I used more sandpaper to distress the whole sign some more until I had it just right. And then I immediately propped the sign on my mantel because I'm in love with it! So pretty! And cheap! And easy! All the exclamations!


  It looks pretty perfect between some of my collected nutcrackers. Such a simple project, but I know it will be a Christmas staple around my house for lots of year. A little french wording to remind me of my Christmas spent in France during college and a pretty piece I love even more because I made it myself! 

  This is a sponsored post and I was given complimentary stencils from Royal Design Studio to review. All photos, opinions, and project ideas are 100% my own! 

Wednesday, October 1, 2014

Around the house. {bathroom makeover}

  Before we moved into our house 3 years ago, we painted two rooms {kitchen and master bedroom}. Outside of that, we haven't done a single thing to the inside of our house. Sure, we've slowly put pictures on the walls and set up our nursery {the most done room in the whole house!}. But we've realllly slacked on truly making this house a home we're really proud of. I think that's a mixture of knowing it's not our forever home, Justin really really hating DIY projects {even when he's not the one doing them}, and my stress over spending money.
  Now that I spend most of my days at home and we're getting closer to putting our house on the market {hopefully in the next year or two}, I have just been itching to do something. Our guest bath seemed like the best place to start because it was kind of painfully boring. Our house is in a starter neighborhood and is full of basic builder grade things- honey oak cabinets, basic laminate flooring, etc. It's hard to tell in the photos below, but it was this gross creamy yellow color and we just hung the shower curtain and towels from our apartment and called it a day. So plain! And I have come to hate that shower curtain over the last few years. Probably because when you look down our hallway, you see straight into the bathroom and, more specifically, the shower curtain. It was definitely time for an upgrade.
  Lucky for Justin, I had some ideas in mind and a tutorial pinned from a couple years ago that I've been waiting to try {kidding- I'm pretty sure he thought I'd ruin our bathroom beyond repair}. Between wood, paint, and hardware, I definitely spent less than $100 on this makeover. But I did pick up a few new towels and floor mats, so that probably bumped the total up closer to $150 for the entire thing. Still, not bad at all for a completely new room and tons of leftover paint for my next project! The whole room- start to finish- took me about 3 days. One to stain/prep the wood. Another to paint the room, and one last to paint the cabinet and hang the mirror and shelves. I was able to do it all during nap times- but rest assured no cooking or dishes got done that entire week. I was also able to use a lot of things I already had on hand or paint/stain borrowed from my mom. So, so easy and it has me already thinking of what room I want to makeover next!


{The bath before we moved in- you can see the paint color and painfully basic builder-grade-ness of the whole room}


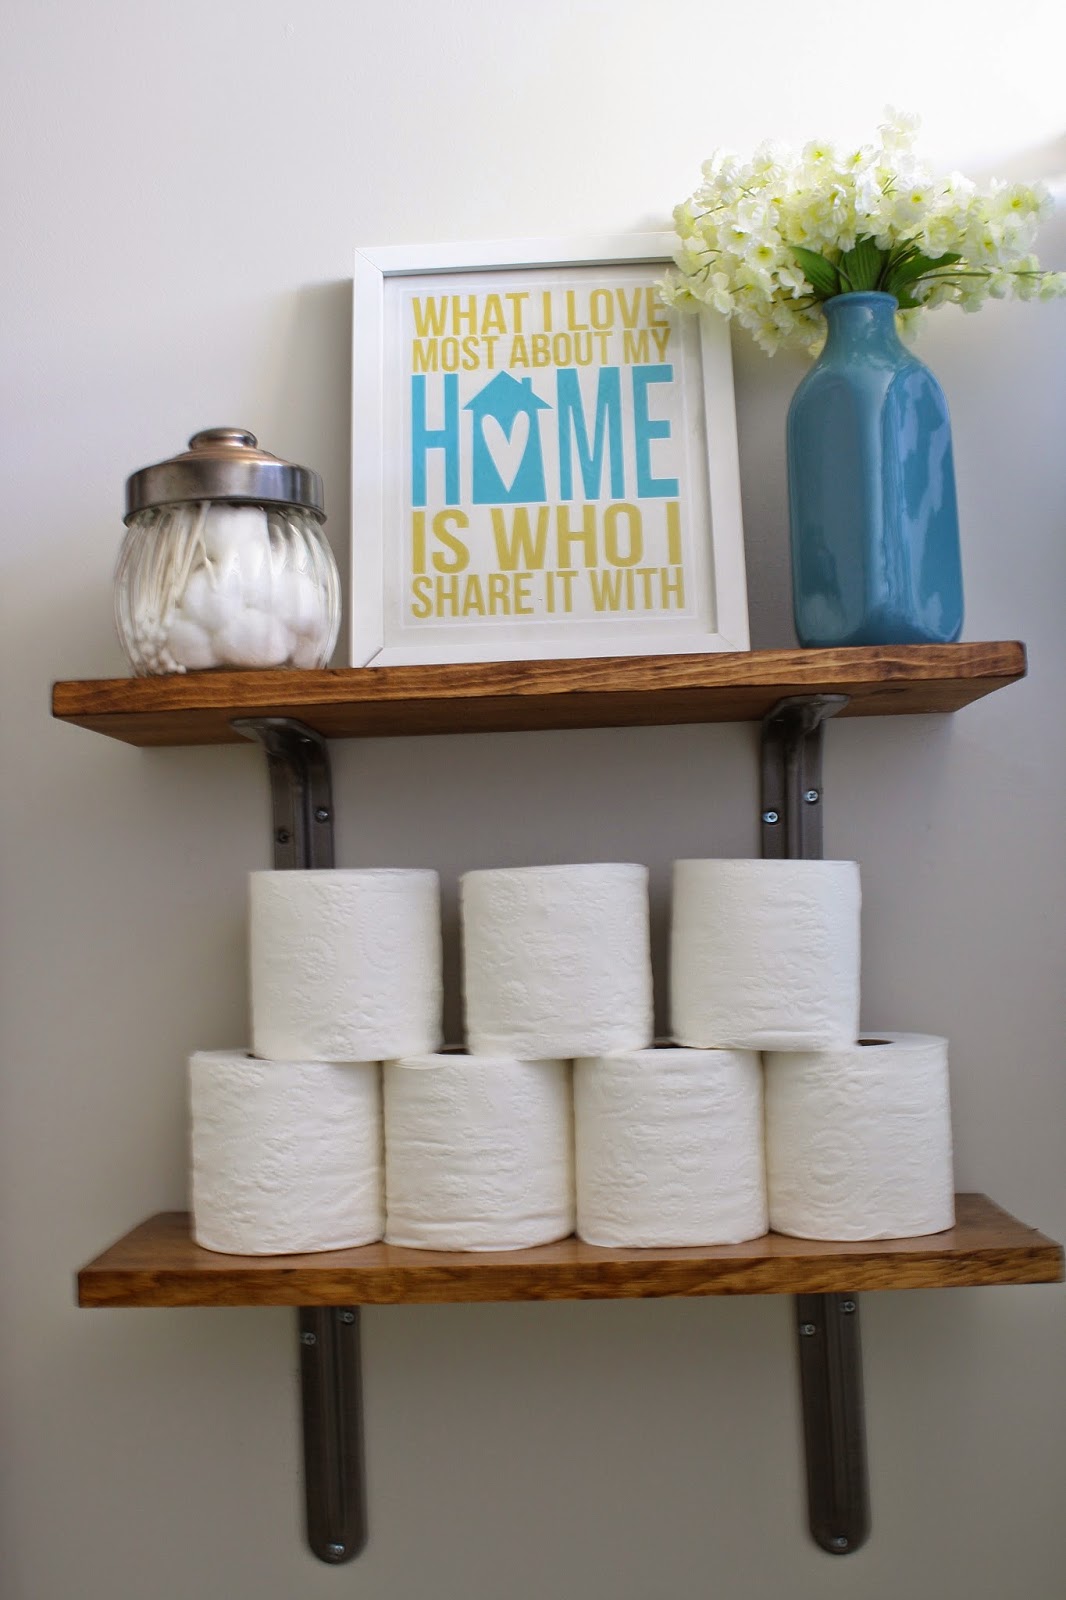
   Even though the photos pretty much speak for themselves, here's a list of the projects I did over the course of the makeover :

//Removed towel racks over toilet and on wall by shower. Replaced with TOWEL hook and stained planks/brackets. {Stained wood to match mirror frame}

//Framed basic builder grade mirror with distressed/stained wood. {using this tutorial- I followed it to a T and it was SO STINKING EASY!}

//Spray painted brackets and hardware to match. 

//Painted cabinets with chalk paint. {I bought a teeny tiny container of paint from Home Depot and after two coats, I still have more than half left. This stuff is amazing}

//Painted entire room a more neutral gray/beige.

//Changed shower curtain, towels, and floor mats. 

And who doesn't love a good ole source list?


Wall paint: Dutch Boy colored to match Benjamin Moore's Pale Oak {$25}
Mirror and shelves: pine planks from Menards, stained in Old American {$15}
Brackets: Menards {had one set on hand, purchased second for $10}
Cabinet Paint: chalk paint from Home Depot in Primitive {$8.50}
TOWEL hook: World Market {$15 after birthday reward}
Shower Curtain: Target {free with gift card!}
Towels/Mats/Vanity basket: HomeGoods

{I'm sharing on the Handmade Hangout

Monday, December 9, 2013

Go-to.


   I know I've shared this recipe before, but if its good- it must be shared again. Our first year of marriage, I was on the hunt for the best chocolate chip cookie recipe. I must have tested a dozen before landing on this gem from a co-worker. I literally use the crumpled, butter stained printed email from her every time I bake these. And {cheese alert} think back to what a sweet time our first year of marriage was. 
  Anyways, it's basically prime time baking season right now. You probably have your stock of go-to recipes {do share!}, but if you're on the hunt for, seriously, the BEST chocolate chip cookie around, you must try this! I love it so much, I'm bringing it to my book club's cookie exchange tonight. {Sidenote: if that statement alone doesn't make me sound like a middle aged woman, I'm not sure what else would}.


Tuesday, November 26, 2013

Fudge.


 I love to bake and cook. It's basically my love language, in addition to sending snail mail and long, drawn out hugs. I also love convenience and simplicity. My most favorite recipes are easy ones. Because, why make life more complicated than it has to be? Also, I love sharing recipes and who wants a longwinded, most likely to fail recipe handed to them? Nope. Short, simple, sweet!
   I must have inherited this from my mom, because some of my favorite, tastiest, and most simple recipes come from her. Like this no fail fudge. So delicious. Who doesn't have 5 minutes for fudge?? So if you're looking for a last minute addition to your Thanksgiving meal or an easy staple to bring to any holiday get-together...make these!

Can't Fail 5-minute **{chocolate} Fudge

Small can of Carnation milk
1/2 tsp salt
6 oz chocolate chips (1/2 bag)
1 2/3 c. sugar
2 c. mini marshmallows
1 tsp vanilla

  Heat milk, sugar, and salt to full boil. Boil for 5 minutes. Remove from heat and stir in remaining ingredients until thoroughly mixed. Pour into buttered dish; let cool. 

**For our Friendsgiving this weekend, I was in the mood for chocolate and pb fudge, so I just layered the two. You could simply substitute pb chips in the recipe above, but I kind of hate fake pb. This is my go-to, favorite {and SUPER easy} pb fudge recipe! 

Monday, August 5, 2013

Pound it.


   I'm a creature of habit. I love trying new recipes and then adopting them into my rotation. I stumbled on this recipe earlier this summer, and have made it no less than 5 times since. Its so easy and delicious and doesn't require a literal pound of everything {because, gross}. Also, I think you could pile fresh berries and cream on top of cardboard, and it would taste amazing. So having extra tasty poundcake just skyrockets the same dish into the crapyourpants delicious category, right? 


Monday, July 15, 2013

Bread and butter.


  Who doesn't love warm, crusty bread right out of the oven?? {Even if you don't, go with it. Its a friendship deal breaker, for sure} Ever since reading Bread & Wine and trying Shauna's ahmazing Sullivan Street bread recipe, I've fallen back in love with baking breads. {I go through baking spurts- cookies, muffins, breads, granolas- you name it and I've been on a kick with it} And while I love the delicious Sullivan Street bread, it needs twelve hours to rise. TWELVE HOURS! Who has time for that? While on the hunt for a quicker, more realistic day-to-day bread, I ended up kind of making up a recipe from a few different I found. Less sugar {who wants sweet dinner bread??}, add in some garlic salt, cook in a random corningware, and convert some measurement from the metric system and- voila!  So-easy dinner bread. Takes no time at all. Goes perfectly with our current dinner staple- garden fresh pesto chicken pasta. With extra pesto on the side for bread-dipping, of course. Also, round loaves of bread kind of blow my mind. So awesome. Thanks for the tip, Shauna!


Linking up here: Jam Hands, This Gal Cooks, Make Ahead Meals

Monday, June 3, 2013

A summer staple.


  Grilling is a summer staple for us {and the rest of America?}, but getting Justin to eat more than mac'n'cheese, marinated chicken, or a burger is hard to do. I've been trying to find ways to sneak more vegetables into his diet, and I've landed on a new favorite recipe {probably more my favorite than his}. Hopefully by next month, we can use veggies from our garden. Wishful thinking? Maybe. 


Thursday, May 30, 2013

Round-up.

  Monday's post had me thinking that it would be fun to do a little round-up of some of my favorite tutorials from this little blog! I learned two things while I was picking my top 5; my picture taking abilities used to REALLY suck {now they just sort of suck} and I've got a buttload more recipes than tutorials to share. Hello, inner fat kid! :) In no particular order- here are my favorite crafty tutorials::

Tuesday, May 28, 2013

Fabric covered planter.


   It might be safe to say that gardening is becoming a hobby for me. Nevermind that my entire garden got scorched last summer and I stopped watering it after July. I am fully embracing the 'fake it til you make it' motto and it may be working for me so far this summer? Too soon to tell. Either way, I'm having a blast growing my garden and watering my boxwoods and filling my planters with blooms that may or may not die in a few days. Watering time has become my jam. Like an 80 year-old woman, its the highlight of my evening. I kind of geek out over filling up my watering can I know, I know. Riveting life I live. 
  And now that I've completely drawn you into the the soap opera life I lead, let me share my fabric covered planter with you! Ha! What a segway. This is just about the simplest project and costs next to nothing. I scored this pot at Goodwill last year for $.25 and had everything else on hand. And I'm kind of obsessed with making these, so fake your surprise if you get one for a birthday or housewarming or no other good reason other than I love you. Mmkay? 


What you'll need:

foam brush
mod podge
fabric
scissors
terra cotta planter


  Start by coating the entire outside of the planter with a generous coat of mod podge and then quickly wrap the fabric. Since you kind of have to roll the fabric on, I've found its best to start with a larger piece of fabric than you'll need and then trim the excess. Make sense?


   After you've wrapped the fabric around the outside, trim the top while leave about 1 1/2 in extra {or however much you'll need to have the fabric fold past the soil line}. You want the inside of the pot to seem lined, too, so cut diagonal slits in the fabric to fold into the pot. 


   Coat the inside with a layer of of modpodge and fold the fabric inside...


   ...and go over with another coat of modpodge. 


   Now smooth as many wrinkles out as possible on the outside of the planter and add a last generous coat of modpodge. Trim the bottom of the fabric and modpodge to seal. 


   Let the pot dry completely before planting. I'm sure there's some sort of waterproof or outdoor modpodge available, but I'm all for using what you have. So, be prepared for your planter to become a bit soggy when watering your flowers. No worries though, it seals up just fine after it dries again. 


   Et voila! Isn't it cute? I kind of love that its imperfect with some of the wrinkles I couldn't/was too lazy to get out. I chose a more basic fabric, but the possibilities are endless. And hey, if my plants end up dying, at least I have a cute pot out of the deal! Silver lining, people.